Jan Hanca
0e8ba06265
Update `Ros2FleetRobot` template (#870)
Jan Hanca
0e8ba06265
Update `Ros2FleetRobot` template (#870)
|
3 miesięcy temu | |
|---|---|---|
| .. | ||
| Screenshots | 1 rok temu | |
| Template | 3 miesięcy temu | |
| docs | 2 lat temu | |
| README.md | 1 rok temu | |
| preview.png | 1 rok temu | |
| template.json | 3 miesięcy temu | |
README.md
ROS2 Fleet Template
Welcome to Robotic Simulation Fleet template for ROS 2 projects! This project is a template designed to help you quickly start simulating robots in Open 3D Engine (O3DE) with Robot Operating System (ROS) 2.
This template focuses on use-cases with multiple robots in environments such as warehouses and fulfillment centers. The warehouse assets used in the template are modular and well-suited for reconfiguration to match a custom warehouse.
To learn about other robotic templates, please refer to documentation of
Robotic templates.

Set up a new project with the template
Please follow the instructions in ROS 2 Gem documentation to install all required dependencies and create your project with a template (make sure to use chose this template during the process).
Spawning robots
The level contains spawn points configured to easily add more Proteus robots through ROS 2 calls.
This is done with the Spawner Component. There are 4 spawn points already added in the level. You can use them all with the following service calls:
ros2 service call /spawn_entity gazebo_msgs/srv/SpawnEntity '{name: 'proteus', xml: 'spawnPoint1'}'& \
ros2 service call /spawn_entity gazebo_msgs/srv/SpawnEntity '{name: 'proteus', xml: 'spawnPoint2'}'& \
ros2 service call /spawn_entity gazebo_msgs/srv/SpawnEntity '{name: 'proteus', xml: 'spawnPoint3'}'& \
ros2 service call /spawn_entity gazebo_msgs/srv/SpawnEntity '{name: 'proteus', xml: 'spawnPoint4'}'
Fleet navigation
This template comes with the example fleet navigation ROS 2 package called o3de_fleet_nav. You can find a prepared ROS 2 workspace in the Examples directory.
This package contains a modified code from nav2_bringup package (https://github.com/ros-planning/navigation2).
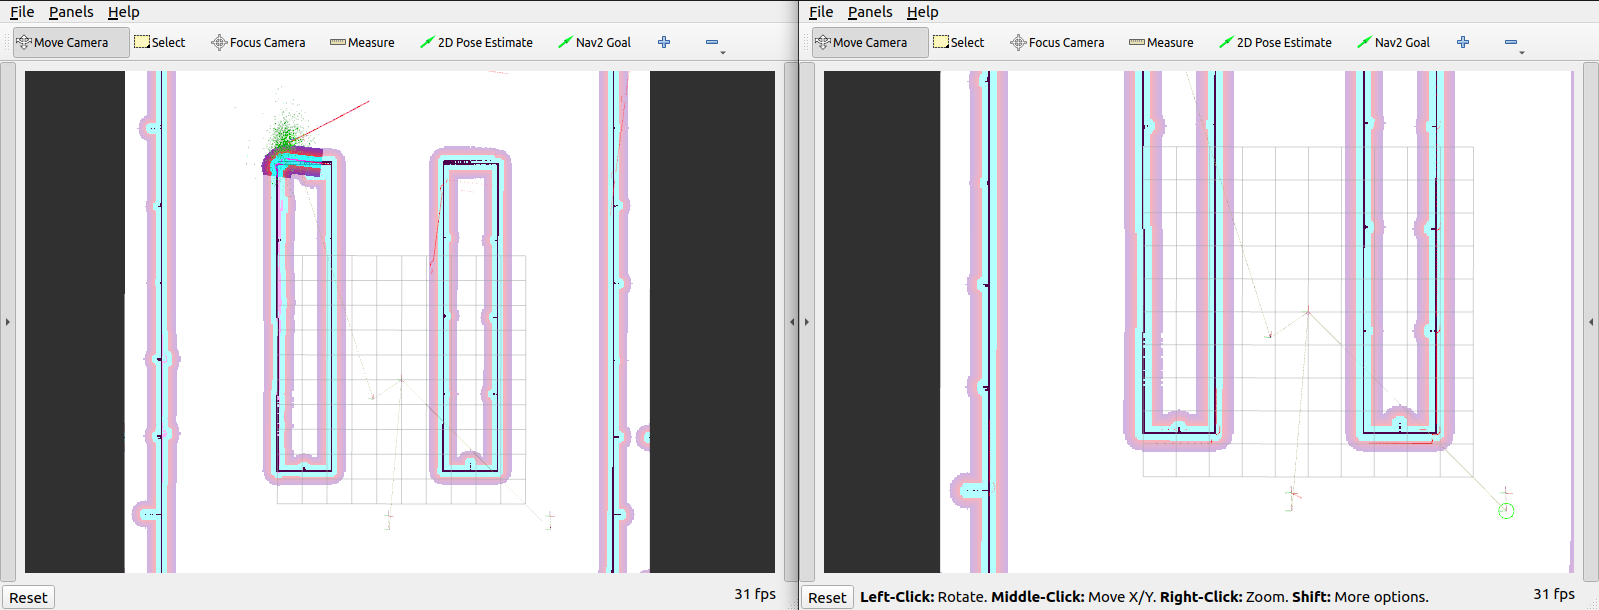
In this example, a fleet of robots is automatically spawned and each individual robot can be controlled via the Rviz2. An AMCL localization is used for robot localization.
Notice: Before running an automated fleet example, please make sure your level doesn't contain any robots in it (they will be spawned).
Fleet configuration
You can configure the fleet by modifying Example/ros2_ws/src/o3de_fleet_nav/config/fleet_config.yaml file:
fleet:
  - robot_name: proteus
    robot_namespace: robot1
    position:
      x: -6.0
      y: 0.5
      z: 0.2
  - robot_name: proteus
    robot_namespace: robot2
    position:
      x: -6.0
      y: 7.5
      z: 0.2
  - robot_name: proteus
    robot_namespace: robot3
    position:
      x: -6.0
      y: -6.0
      z: 0.2
This configuration file contains the data about each robot in a fleet:
- name (a type of the robot to spawn),
- namespace (must be unique per spawned robot),
- spawning position (spawn position is also used as an AMCL initial estimation).
In this example, only the proteus robot is supported.
You can modify contents of this file to add/remove robots or change their initial positions.
Notice: You have to rebuild the ROS 2 workspace for changes to update.
Navigation configuration
You can configure navigation parameters by modifying Examples/ros2_ws/src/o3de_fleet_nav/params/<ROS_DISTRO>/nav2_*.yaml files.
Please visit the nav2 configuration guide for a detailed description of the navigation parameters.
Notice: You have to rebuild the ROS 2 workspace for changes to update.
Topics and frames
Every spawned robot will have its own namespace for all topics. For the first robot ('robot1' namespace), these will be:
/robot1/cmd_vel: The topic to control the robot./robot1/scan- The topic of simulated 2D laser scanner sensor.
The first spawned robot also provides the following transformations:
/robot1/odom/robot1/base_link/robot1/lidar
To understand more about transformations, see ROS 2 navigation documentation.
Using your robots in the simulation
You can also use your robots in the simulation. To do so, you need to:
- import a robot from URDF or SDFormat file,
- or create a robot from scratch in a O3DE editor using ROS 2 gem components (see Frames),
- make sure that your robot has a 2D lidar attached
- and publishes scans on
scantopic (see Sensors),
- and publishes scans on
- is controlled via the
cmd_veltopic (see Robot Control).
When you have your robot set up:
- create a prefab out of it (skip if URDF importer did that for you),
- load the
Warehouselevel, - assign the prefab to the
RobotSpawnerentity insideROS2 Spawner Componentwith a preferred name.
Then you can alter fleet_config.yaml file to change the robot name to the assigned one, and start the fleet simulation with your robot!
Building
Source ROS 2:
. /opt/ros/humble/setup.bashGo to the ROS 2 workspace:
cd Examples/ros2_wsInstall ROS 2 dependencies:
rosdep update
rosdep install --from-paths src -y --ignore-src
Build workspace:
colcon build --symlink-install
Running
Run the
Warehouselevel in O3DE editor.Source ROS 2 and the
o3de_fleet_navworkspace:. /opt/ros/humble/setup.bashSource the
o3de_fleet_navworkspace:cd Examples/ros2_ws . ./install/setup.bashRun the fleet example:
ros2 launch o3de_fleet_nav o3de_fleet_nav_launch.py
Several RViz2 windows should appear. You can use the "Nav2 Goal" button to send goal to the robot.